
Voicelink SIP Setup
Connect a Voicelink DID to your OmniDimension agents over SIP. The host, port, and dial prefix are filled in for you, so you only pick Voicelink and enter your number.
Voicelink connects to OmniDimension over a shared SIP trunk. You set your trunk and DID to route through OmniDimension in the Voicelink panel, then import the number on the OmniDimension dashboard. The connection details (host, port, and dial prefix) are applied automatically when you pick Voicelink, so there is nothing to copy by hand.
Prerequisites
- A Voicelink account with a DID and a SIP trunk
- Access to the Voicelink admin panel
- The DID number you want to use with your agent
Step-by-step configuration
Set the trunk to OmniDimension
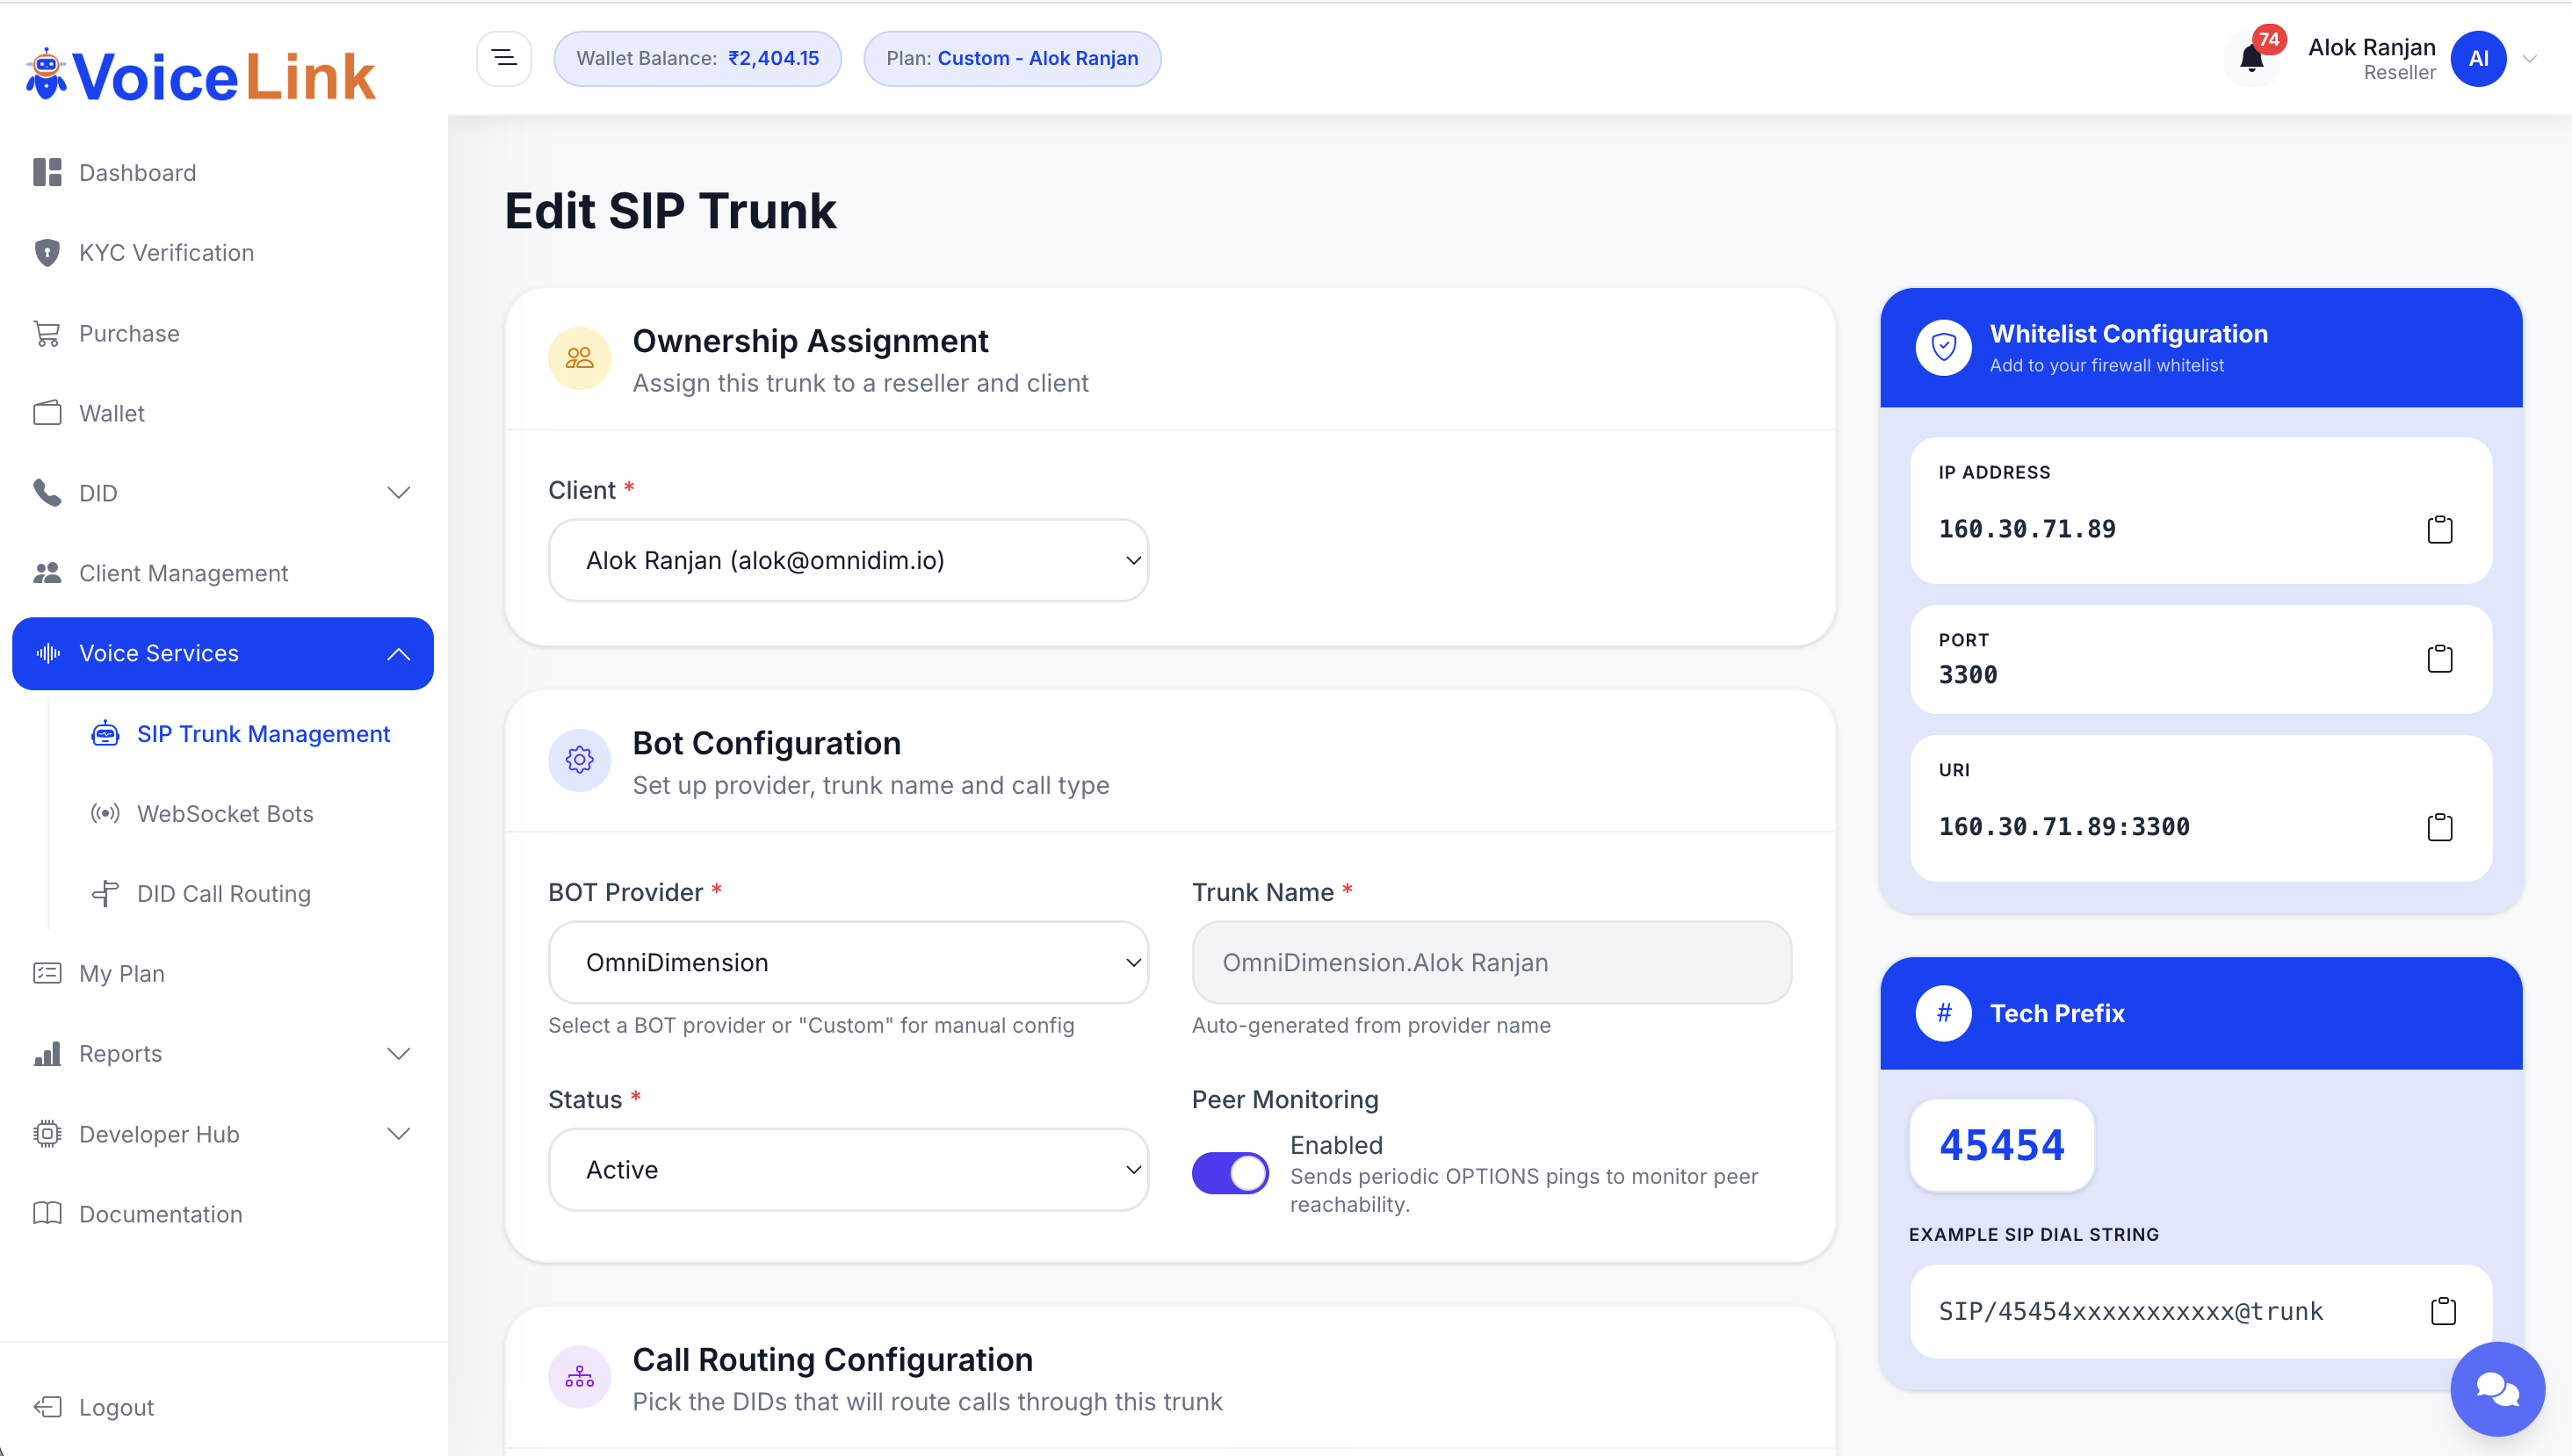
In the Voicelink panel, open Voice Services → SIP Trunk Management and edit your trunk. Under Bot Configuration:
- BOT Provider: select OmniDimension
- Status: set to Active
- Leave Peer Monitoring enabled
Route your DID through the trunk
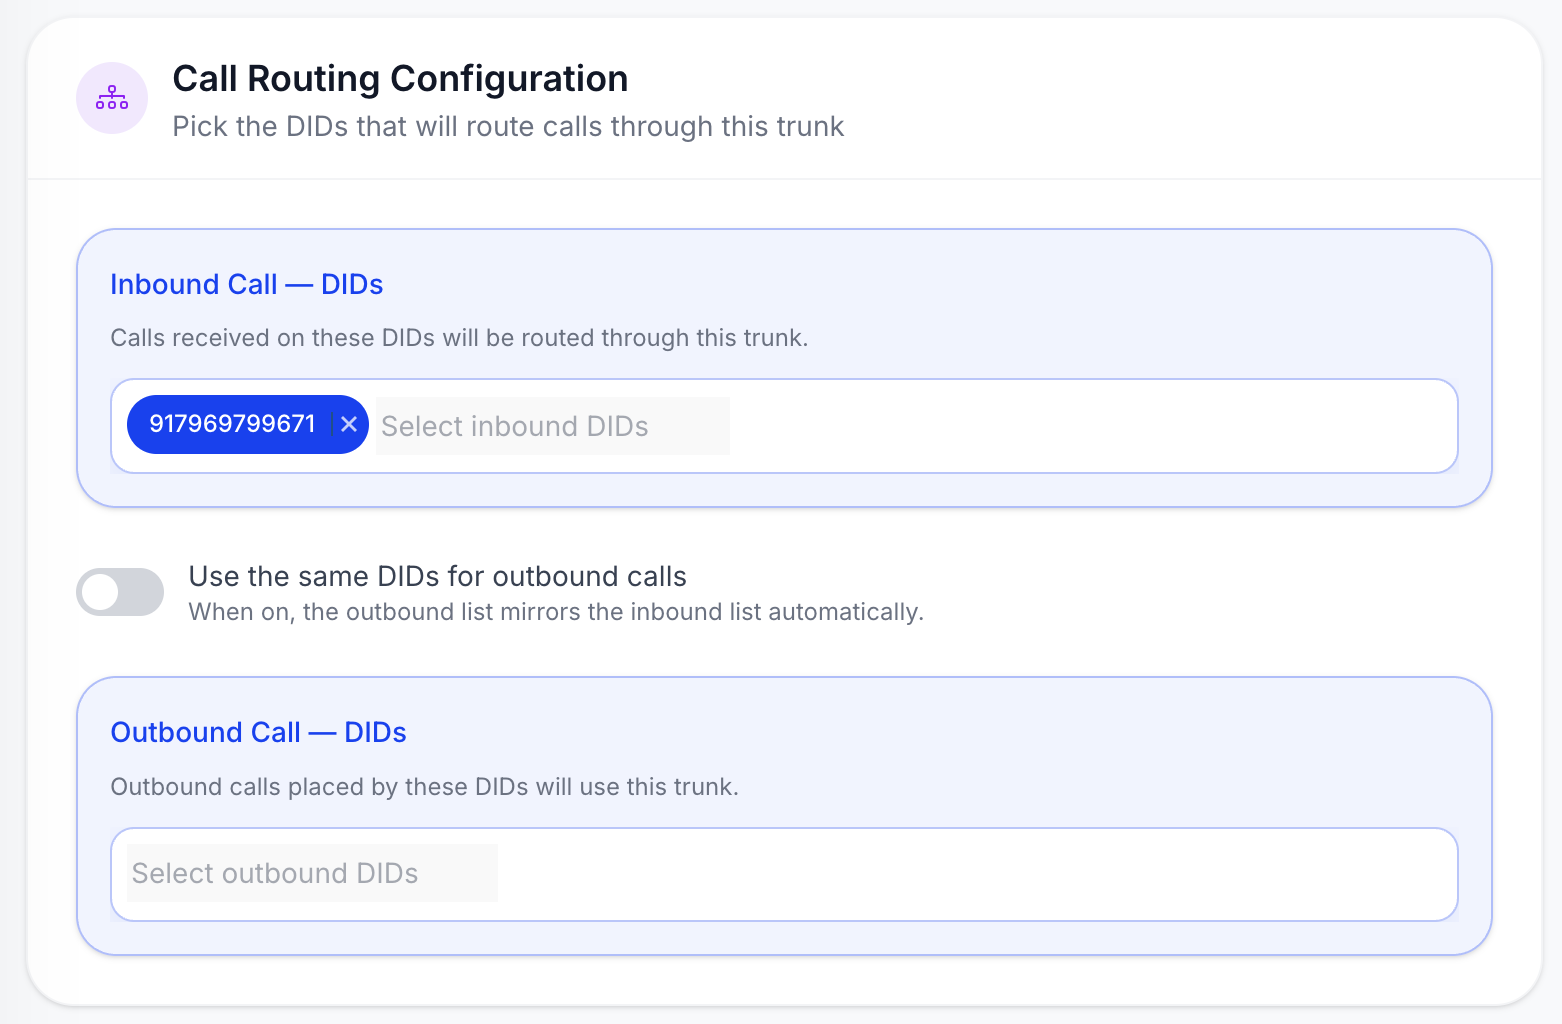
On the same trunk page, under Call Routing Configuration, add your DID to Inbound Call - DIDs (and to the outbound list, or turn on Use the same DIDs for outbound calls).
Configure the DID routing
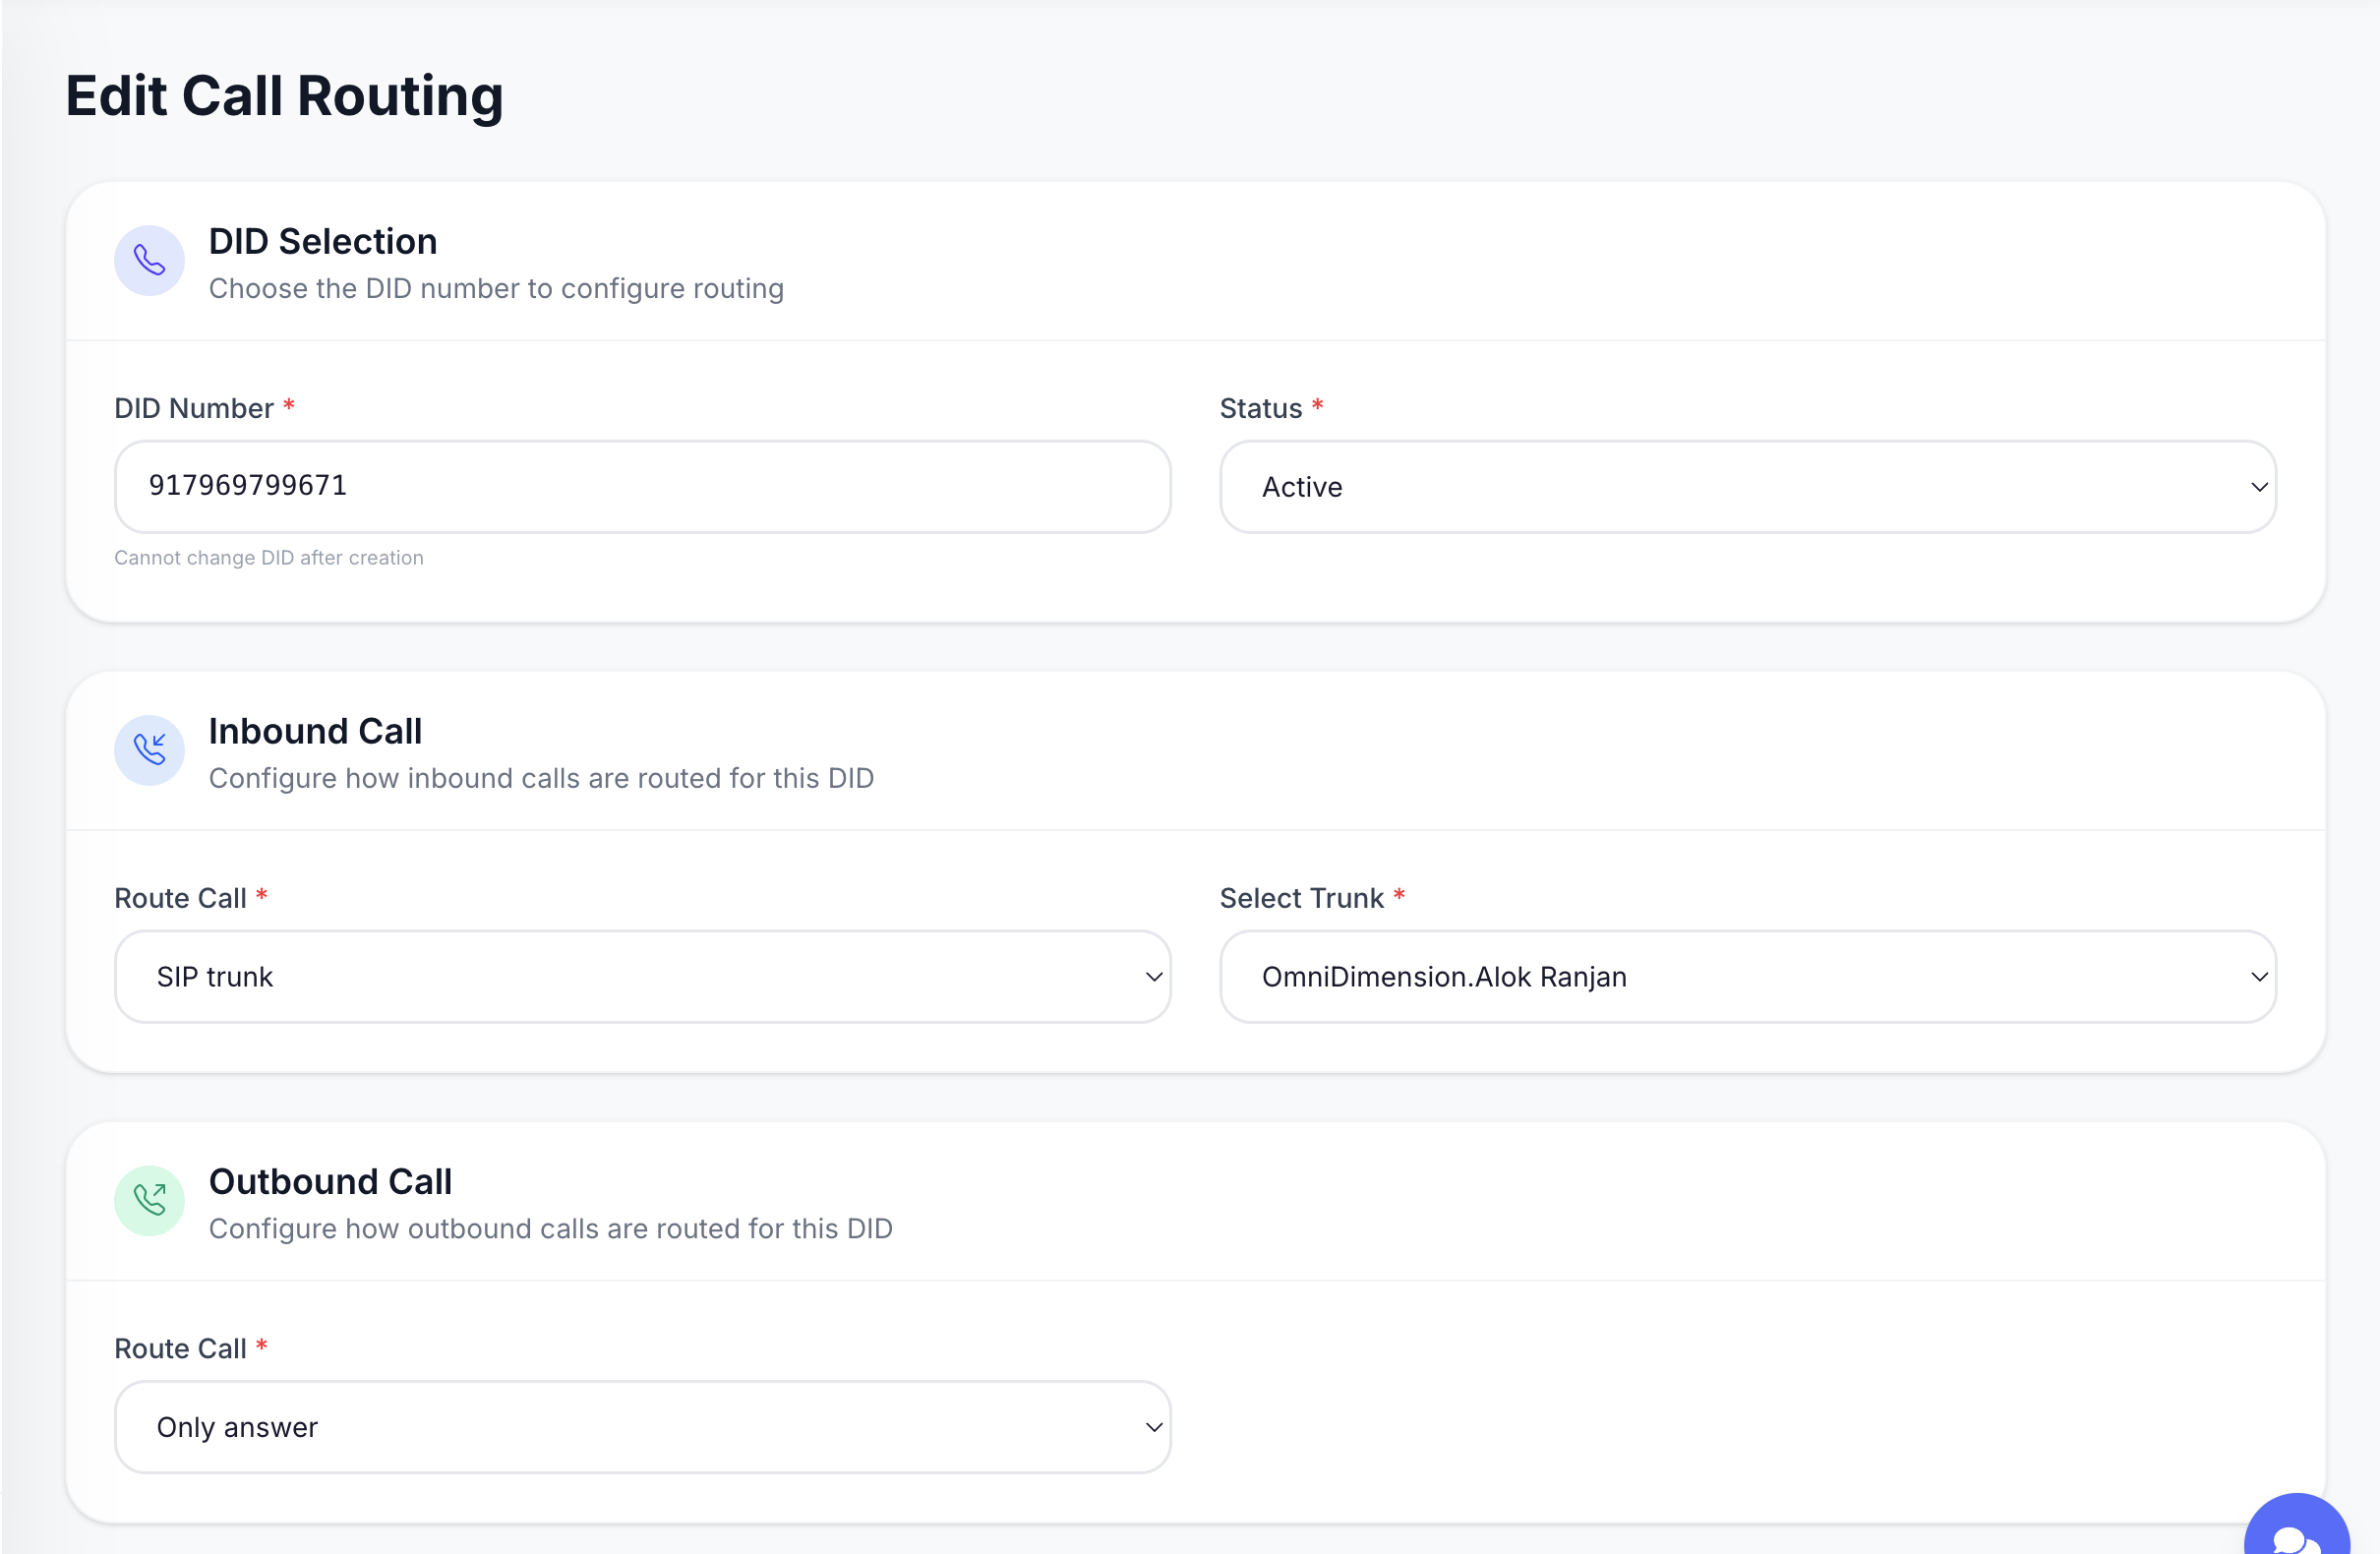
Open Voice Services → DID Call Routing, edit your DID, and set:
- Status: Active
- Inbound Call → Route Call: SIP trunk, then select your trunk
- Outbound Call → Route Call: Only answer
Import the number to OmniDimension
On the OmniDimension dashboard:
- Go to Phone Numbers
- Click Import from SIP Trunk
- Select Voicelink as your provider
- Enter a name and your Voicelink DID number
- Click Import Number
The host, port, and dial prefix are set for you. You do not need to enter SIP credentials.
Voicelink authenticates by our server's IP, so there is no username or password to enter. If your number does not connect after import, recheck that the trunk and DID are both Active in the Voicelink panel.