
Dynamic Campaign Guide
Create a Dynamic Campaign that accepts contacts in real time via a webhook API. Ideal for CRM integrations and continuous outreach.
A Dynamic Campaign is a special type of bulk call campaign where contacts are added in real time through an API webhook, instead of being uploaded all at once via a CSV file.
- Stays alive indefinitely; never auto-completes when the queue empties
- Accepts new contacts at any time via a simple HTTP POST webhook
- Transitions to Waiting status when the queue is empty, then resumes automatically when a new contact arrives
- Perfect for CRM integrations, real-time lead pipelines, or always-on outreach campaigns
- Supports the same scheduling, auto-retry, and call-rescheduling features as regular campaigns
Prerequisites
Before creating a Dynamic Campaign, make sure the following are in place.
- A phone number in your dashboard. Buy one directly from the Number Shop or import your own (Twilio, etc.)
- An AI agent configured and attached to that phone number
- An API key for authenticating webhook requests. Find it in the sidebar under Account & Billing → API
- The external system (CRM, automation platform, etc.) that will send contacts to the webhook
Creating a Dynamic Campaign
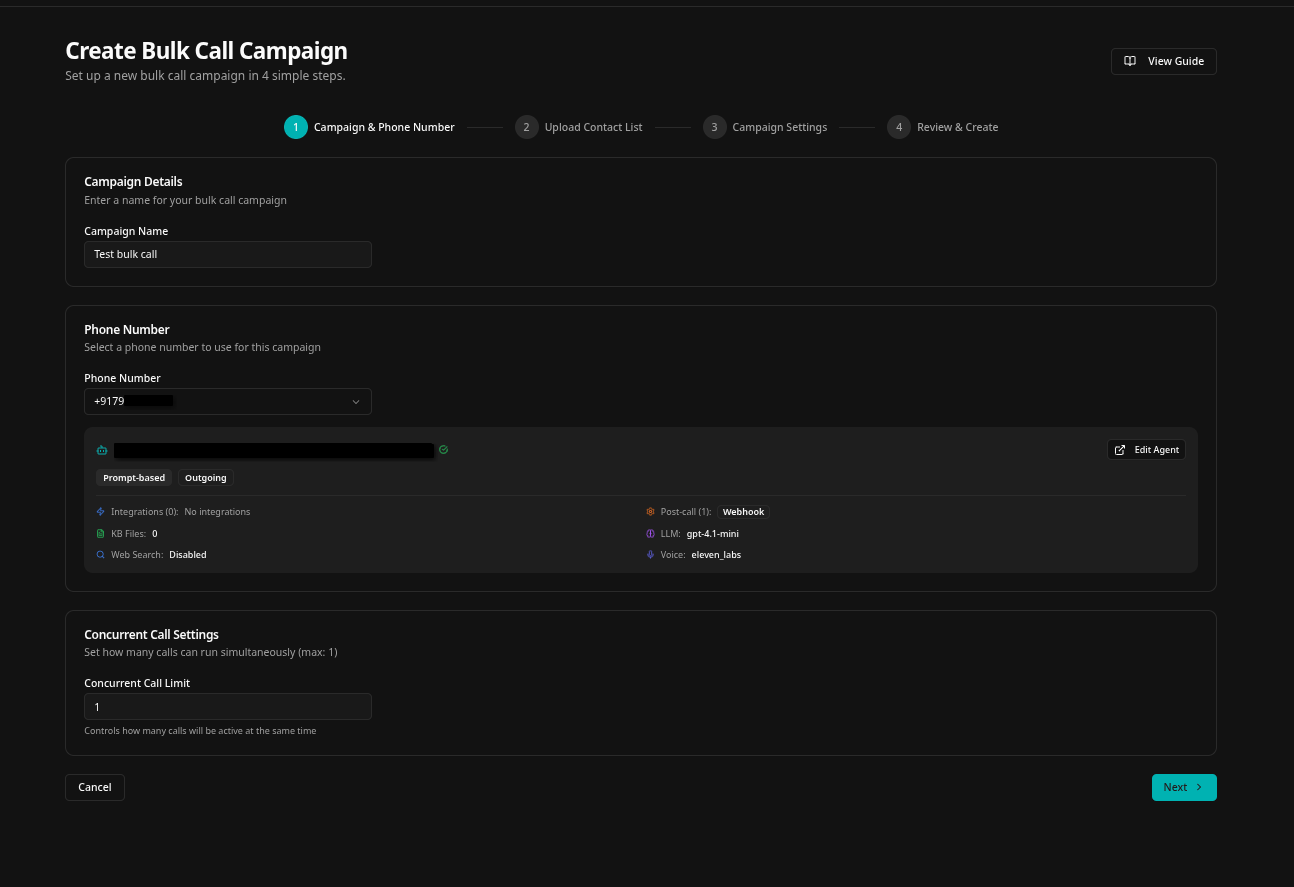
Campaign details and phone number
Start the campaign creation wizard. Enter a campaign name and select the phone number with the attached agent.
- Navigate to Bulk Call from the dashboard sidebar
- Click Create New Campaign
- Enter a descriptive campaign name (e.g., "Real-Time Lead Outreach")
- Select your phone number from the dropdown. The attached agent will be shown automatically
- Click Next to continue
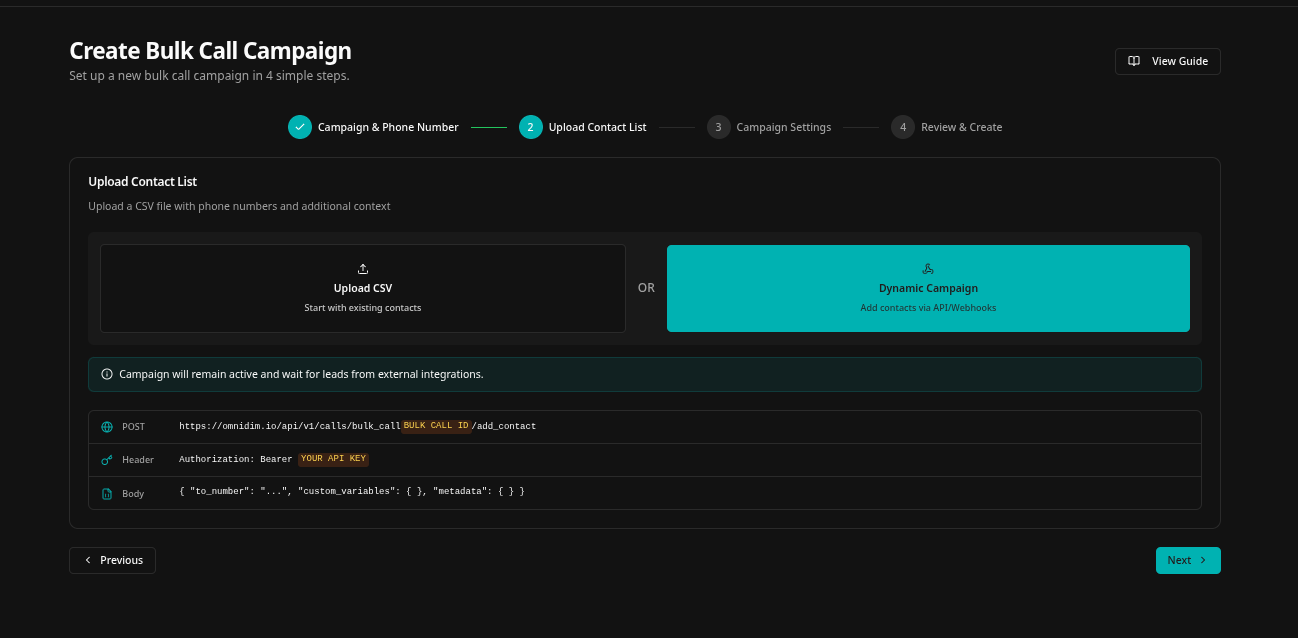
Enable dynamic mode
On the contact upload step, switch from CSV upload to Dynamic Campaign mode.
- You will see two options: Upload CSV File and Dynamic Campaign (Add contacts via API/Webhooks)
- Select Dynamic Campaign
- No CSV file is required. Contacts will be added later through the webhook
- Optionally configure Call Conditions to automatically filter which contacts get called
- Click Next to continue
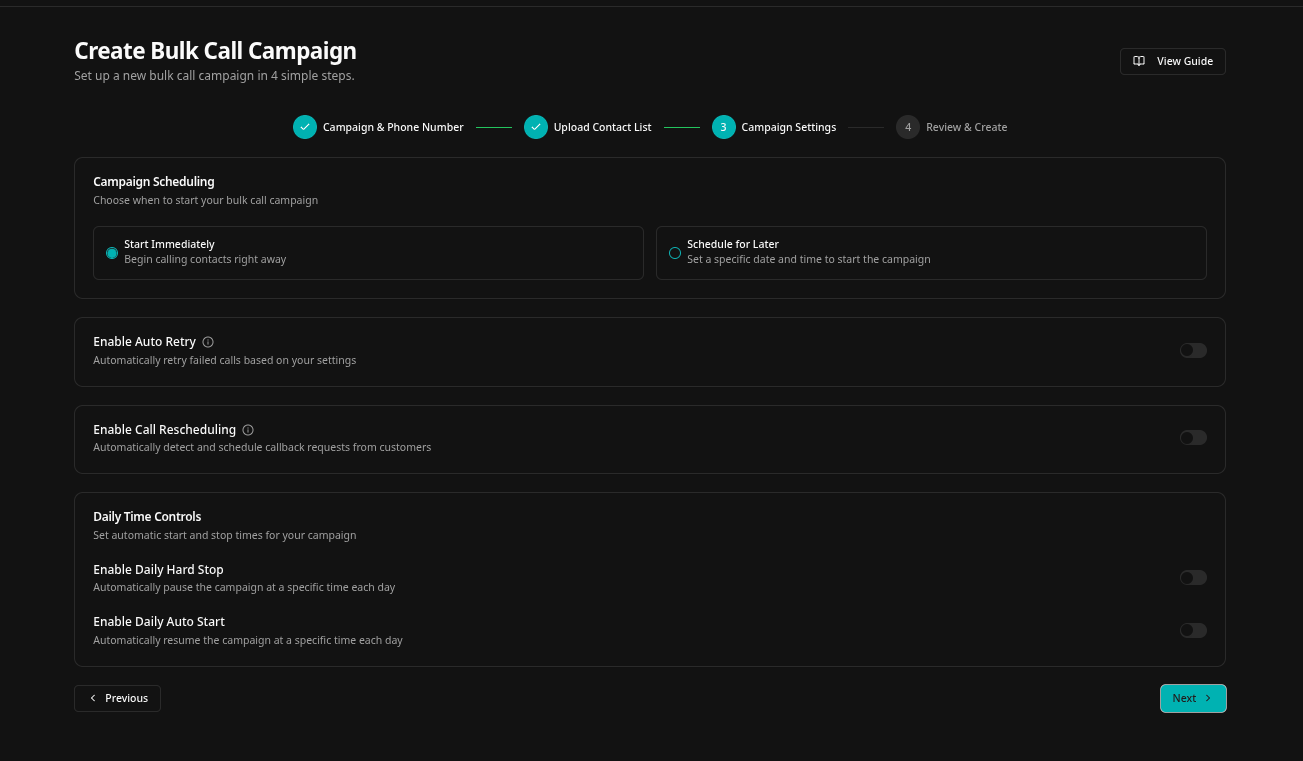
Scheduling and retry settings
Configure when the campaign runs and set up auto-retry for failed calls.
- Choose Start Immediately or Schedule for Later with a specific date, time, and timezone
- Enable Daily Hard Stop to pause calling outside of business hours
- Enable Daily Auto Start to automatically resume calls each morning
- Turn on Auto Retry and set a retry limit (up to 6 attempts) for failed calls
- Enable Call Rescheduling to let the AI handle "call me back later" requests automatically
- Click Next to review
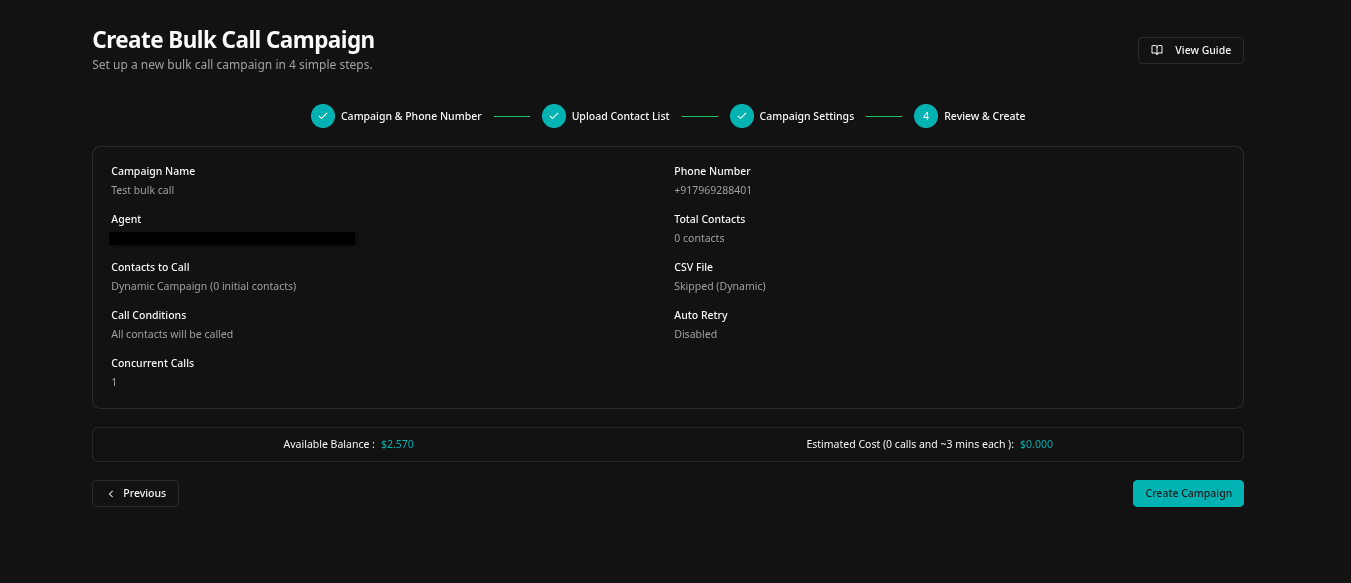
Review and create
Review all campaign settings before launching the Dynamic Campaign.
- Confirm the campaign name, phone number, and agent
- Verify the campaign type is shown as Dynamic Campaign
- Check scheduling and retry configuration
- Click Create Campaign. The campaign will start and wait for contacts via webhook
Creating a Dynamic Campaign via API
You can also create a Dynamic Campaign directly from the API, without the
dashboard wizard. Call Create bulk call
with is_dynamic set to true. contact_list is optional, so you can
start the campaign empty and feed it entirely through the webhook.
curl -X POST "https://backend.omnidim.io/api/v1/calls/bulk_call/create" \
  -H "Authorization: Bearer YOUR_API_KEY" \
  -H "Content-Type: application/json" \
  -d '{
    "name": "Real-Time Lead Outreach",
    "phone_number_id": "1",
    "is_dynamic": true
  }'
The response includes the new campaign id and a current_status of
waiting. Use that id as the {campaign_id} in the
Add contact to dynamic campaign
webhook to start pushing contacts.
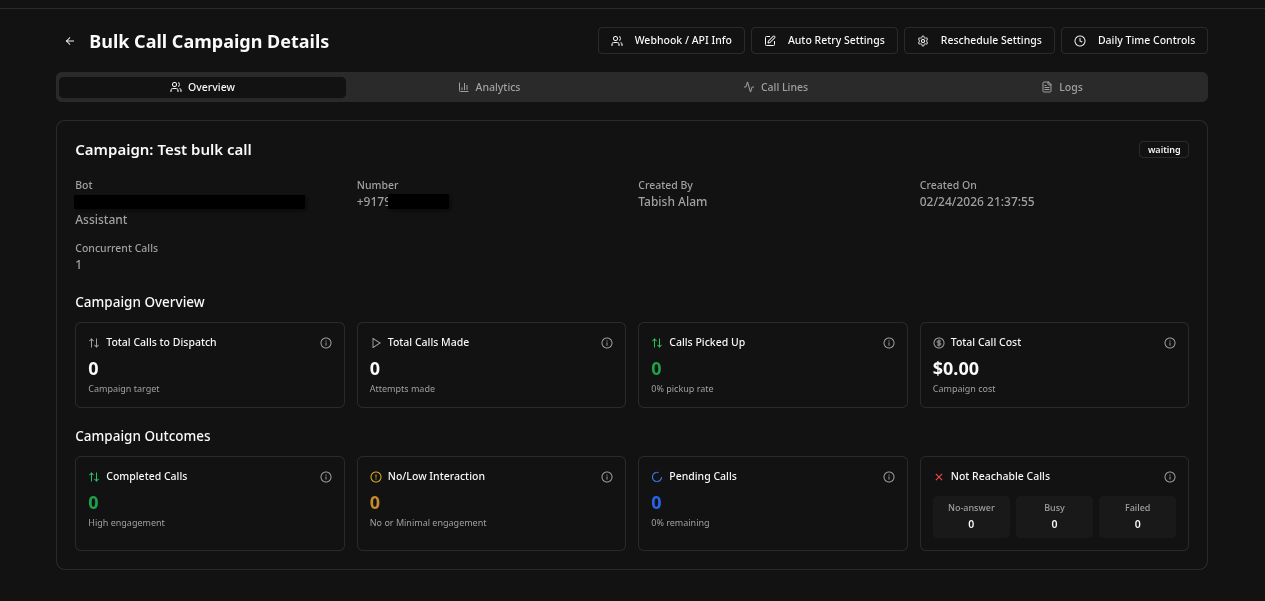
Campaign status flow
After creation, a Dynamic Campaign cycles through these statuses automatically.
- In Progress: actively making calls from the queue
- Waiting: queue is empty; campaign is idle but alive, ready to resume when a contact arrives
- Auto Paused: outside operating hours (if daily hard stop is configured)
- Paused: manually paused by the user
- A Dynamic Campaign will never move to Completed; it stays alive indefinitely
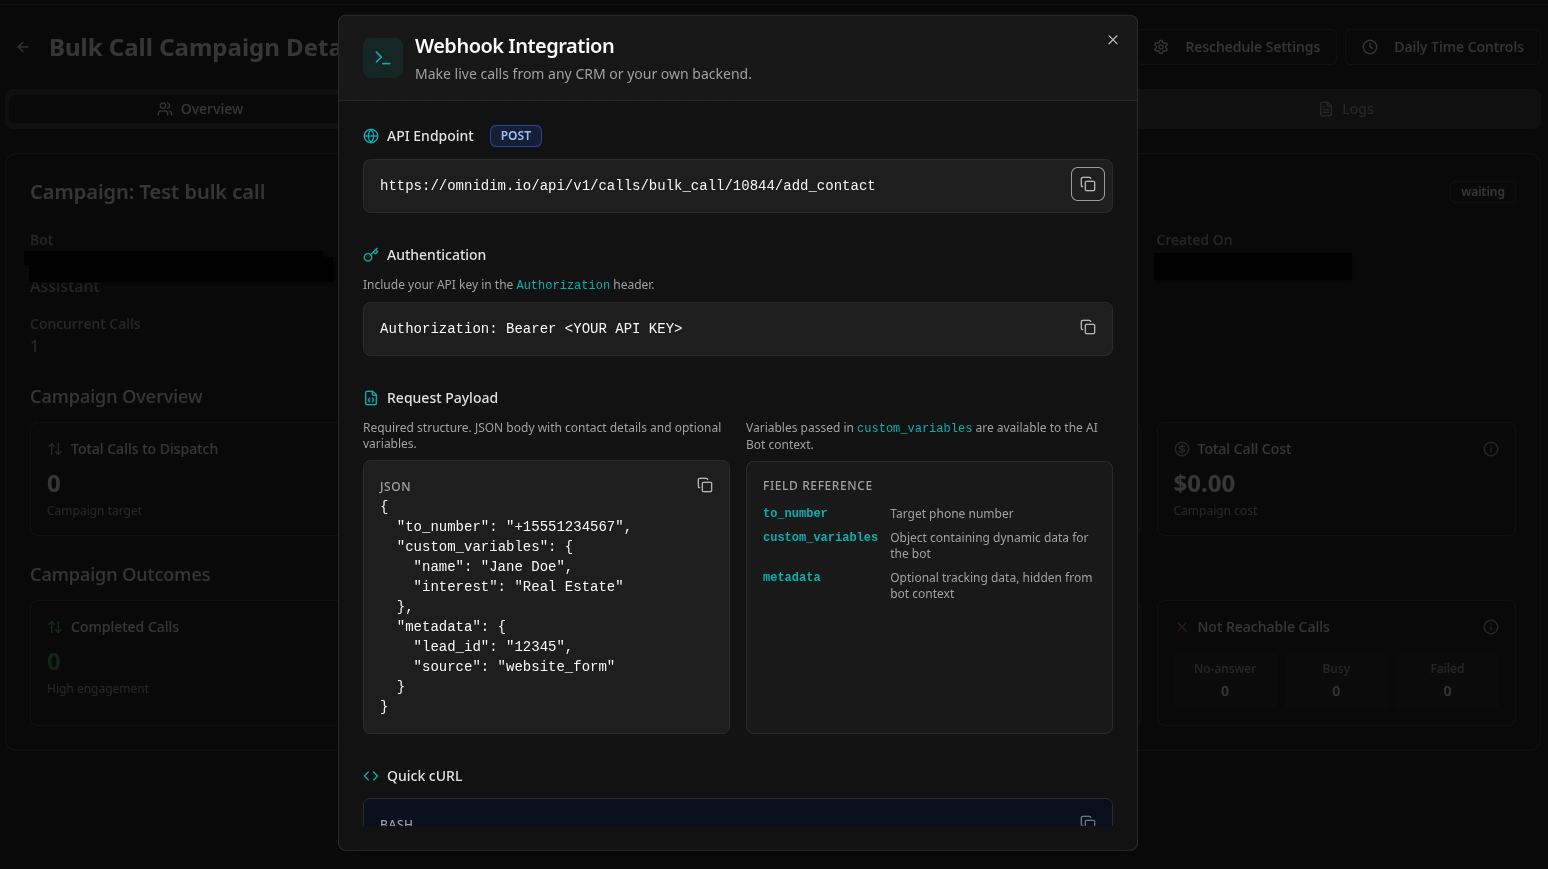
Adding contacts via webhook
Once the campaign is created, use the webhook API to push contacts from any external system.
- Find the Campaign ID on the campaign detail page
- Send a POST request to the webhook endpoint with the contact's phone number
- Include
custom_variablesto pass context to the AI agent (e.g., name, reason for call) - Include
metadatafor your own tracking (not shared with the agent) - The campaign will immediately start calling if it is in Waiting or In Progress status
See the Add contact to dynamic campaign API reference for the full request and response schema.
Webhook request format
- Endpoint:
POST /api/v1/calls/bulk_call/{campaign_id}/add_contact - Header:
Authorization: Bearer YOUR_API_KEY - Body
to_number: The contact's phone number in E.164 format (e.g.,+15551234567) - Body
custom_variables: Key-value pairs injected into the agent's conversation context - Body
metadata: Key-value pairs stored for tracking purposes only (hidden from agent)
Example: cURL
curl -X POST "https://backend.omnidim.io/api/v1/calls/bulk_call/123/add_contact" \
  -H "Authorization: Bearer YOUR_API_KEY" \
  -H "Content-Type: application/json" \
  -d '{
    "to_number": "+15551234567",
    "custom_variables": {
      "name": "Jane Doe",
      "interest": "Home Insurance"
    },
    "metadata": {
      "crm_lead_id": "lead_9876",
      "source": "website_form"
    }
  }'
Webhook response
A successful request returns the updated campaign status and the new contact's line ID.
status: "success"confirms the contact was acceptedcampaign_statusshows the current campaign state (e.g.,in_progressorwaiting)line_idis the unique ID of the new contact record in this campaign- If the campaign is outside operating hours, the contact is queued and called when the campaign resumes
Campaign management
You can control a Dynamic Campaign at any time from the campaign detail page.
- Pause: temporarily stop all outbound calls (contacts added while paused will be called on resume)
- Resume: restart a paused campaign
- Cancel: permanently end the campaign; no further contacts will be accepted
- Update Retry Settings: change retry limits and schedule without recreating the campaign
- Update Reschedule Settings: enable or disable AI-driven call rescheduling mid-campaign
Best practices
- Use meaningful
custom_variablesthat match variables in your agent's welcome message or prompt - Set daily operating hours to avoid calling contacts outside business hours
- Enable auto-retry to recover from unanswered or failed calls without manual intervention
- Use the
metadatafield to store CRM or tracking IDs so you can correlate call results with your records - Monitor the campaign status via the dashboard or poll
/api/v1/calls/bulk_call/{id}for real-time status - Pause the campaign before making major agent changes to avoid inconsistent conversations mid-campaign