

Test and publish
Run a workflow with sample data, read the result, then publish it and turn on its live link.
Run a test
Test runs your current draft once with sample data you type in. You don't need to publish first.
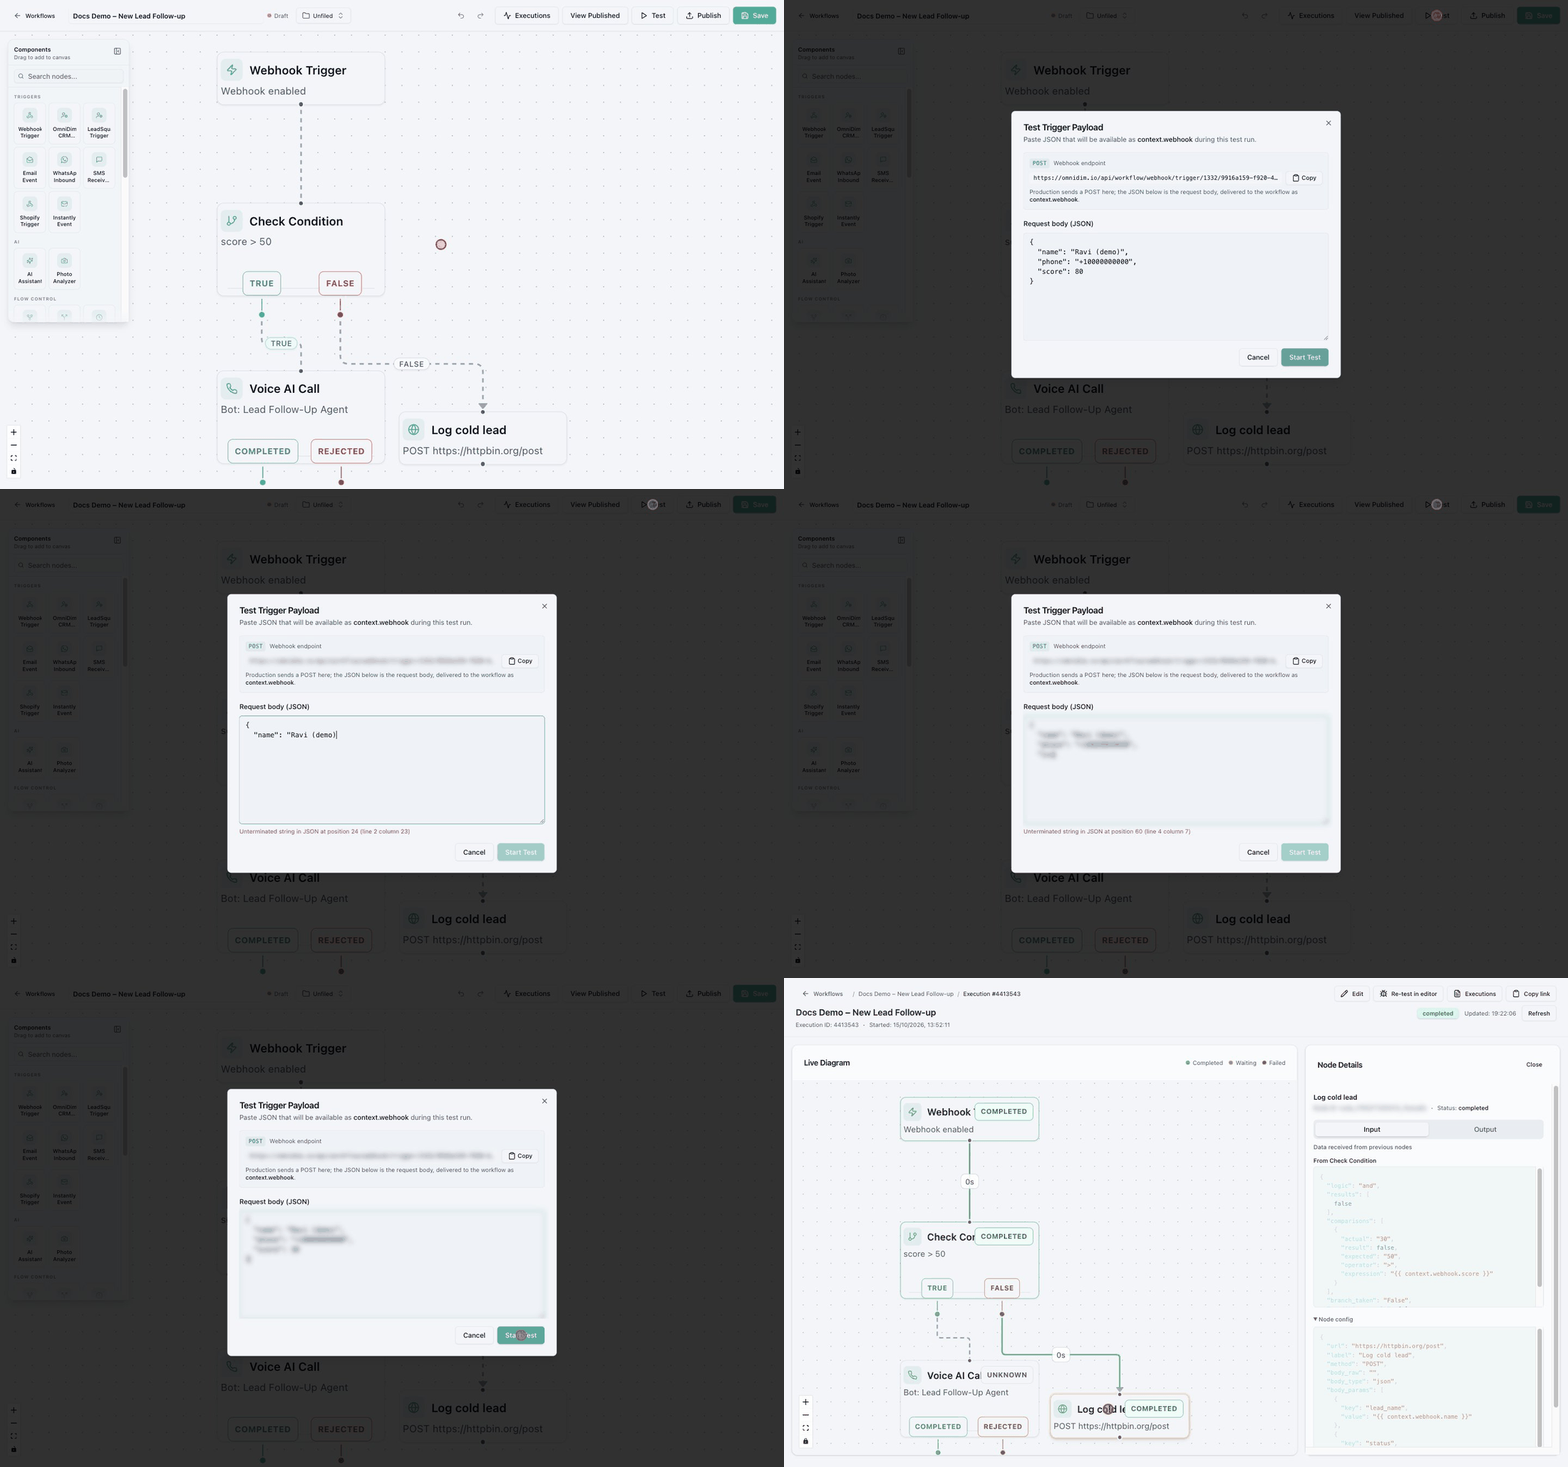
Open the test box
Click Test. The Test Trigger Payload box opens, already filled with the fields your workflow uses.
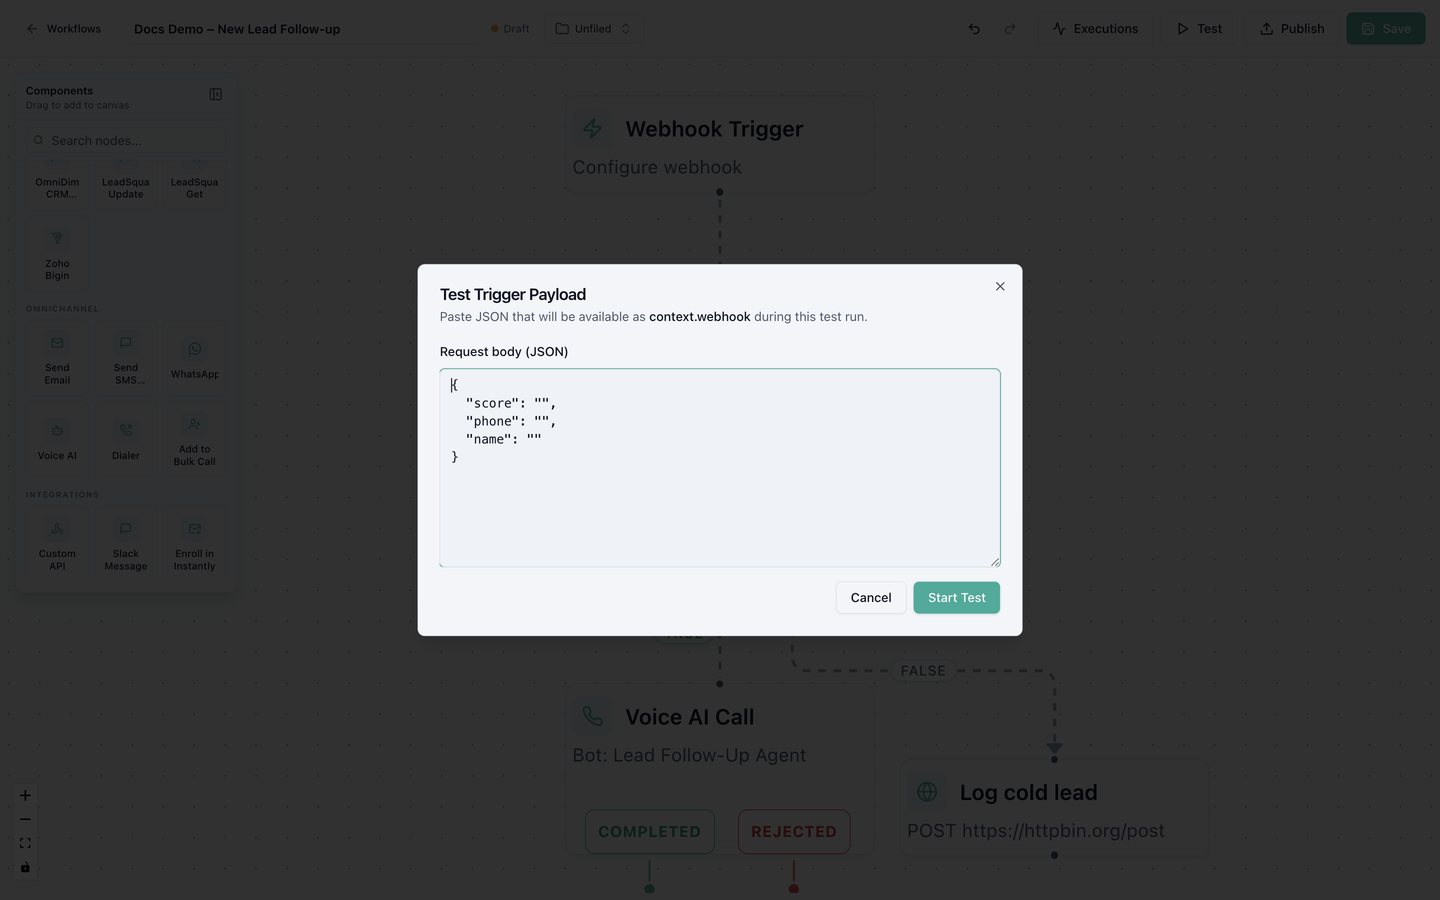
Fill in sample values
Use realistic values. To try one branch, pick values that lead there, for example a score below 50 for the cold path.
Start the test
Click Start Test. The run's live view opens.
Read a run
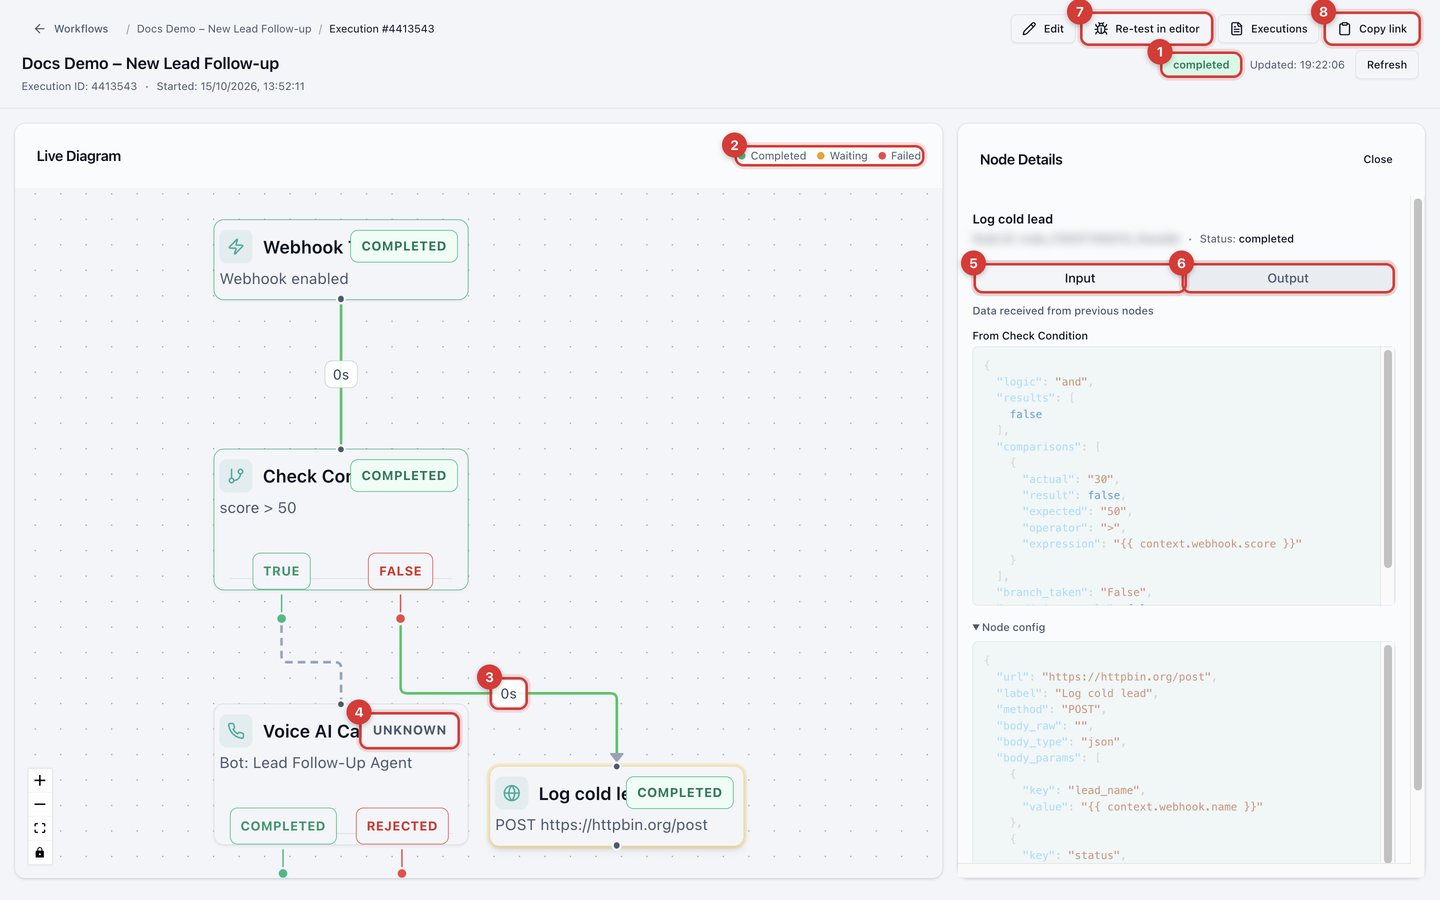
- Overall result: completed, waiting, failed, or canceled.
- Color key: green completed, amber waiting, red failed.
- Time spent between nodes.
- UNKNOWN means the run did not go down this path.
- and 6. Click any node to see what it received (Input) and what it produced (Output).
- Re-test in editor returns to the builder.
- Copy link shares this run with a teammate.
Publish
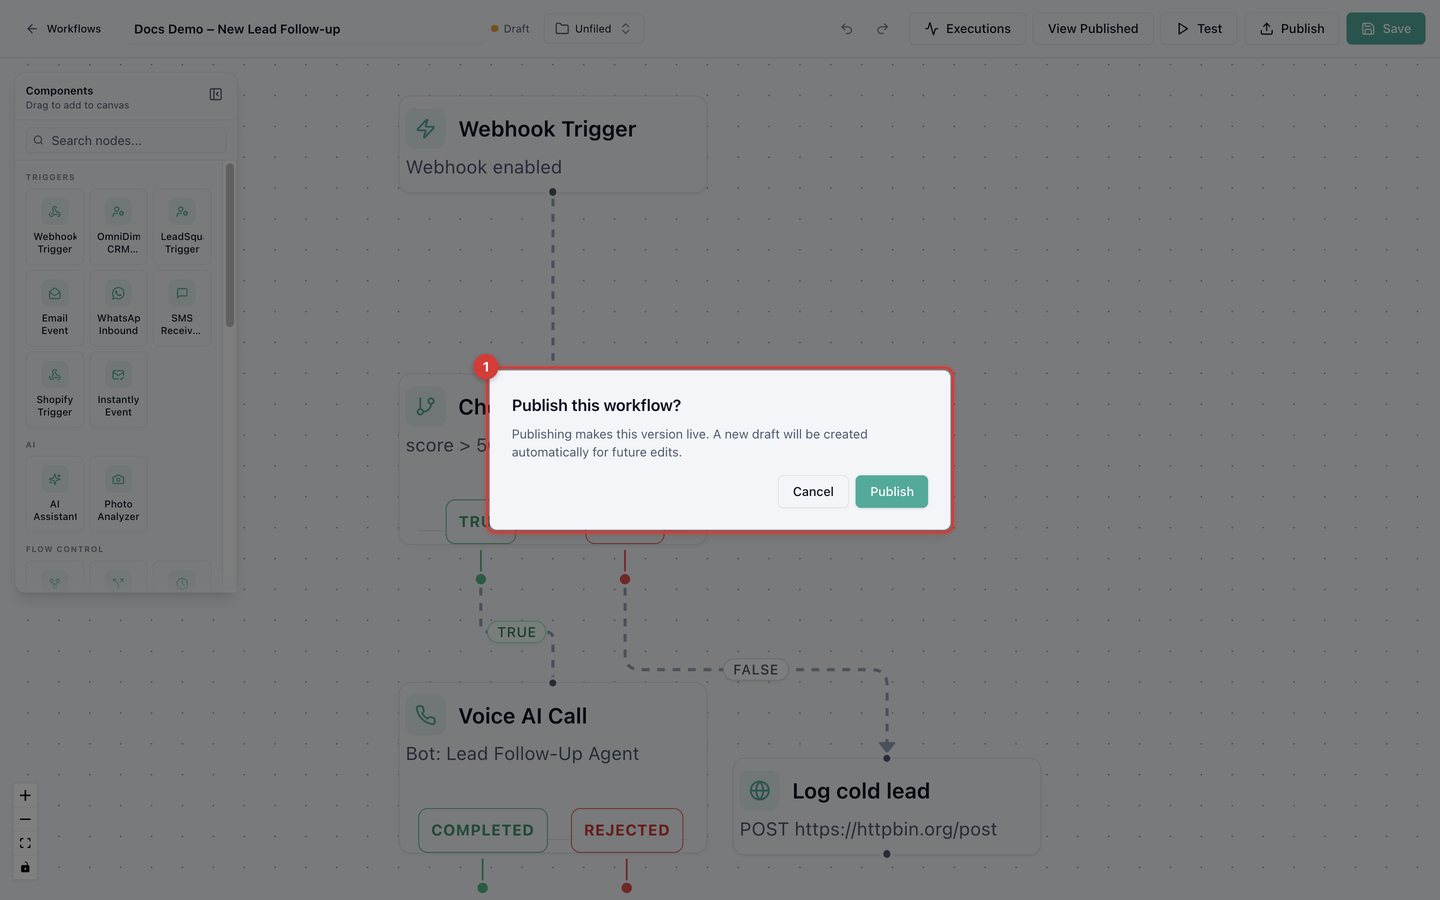
Publish the workflow
Click Publish and confirm. The current version goes live, and a fresh draft is created for future edits.
Turn on the live link
Open the trigger and switch on Webhook Trigger (Production). Your private Webhook URL appears with a copy button.
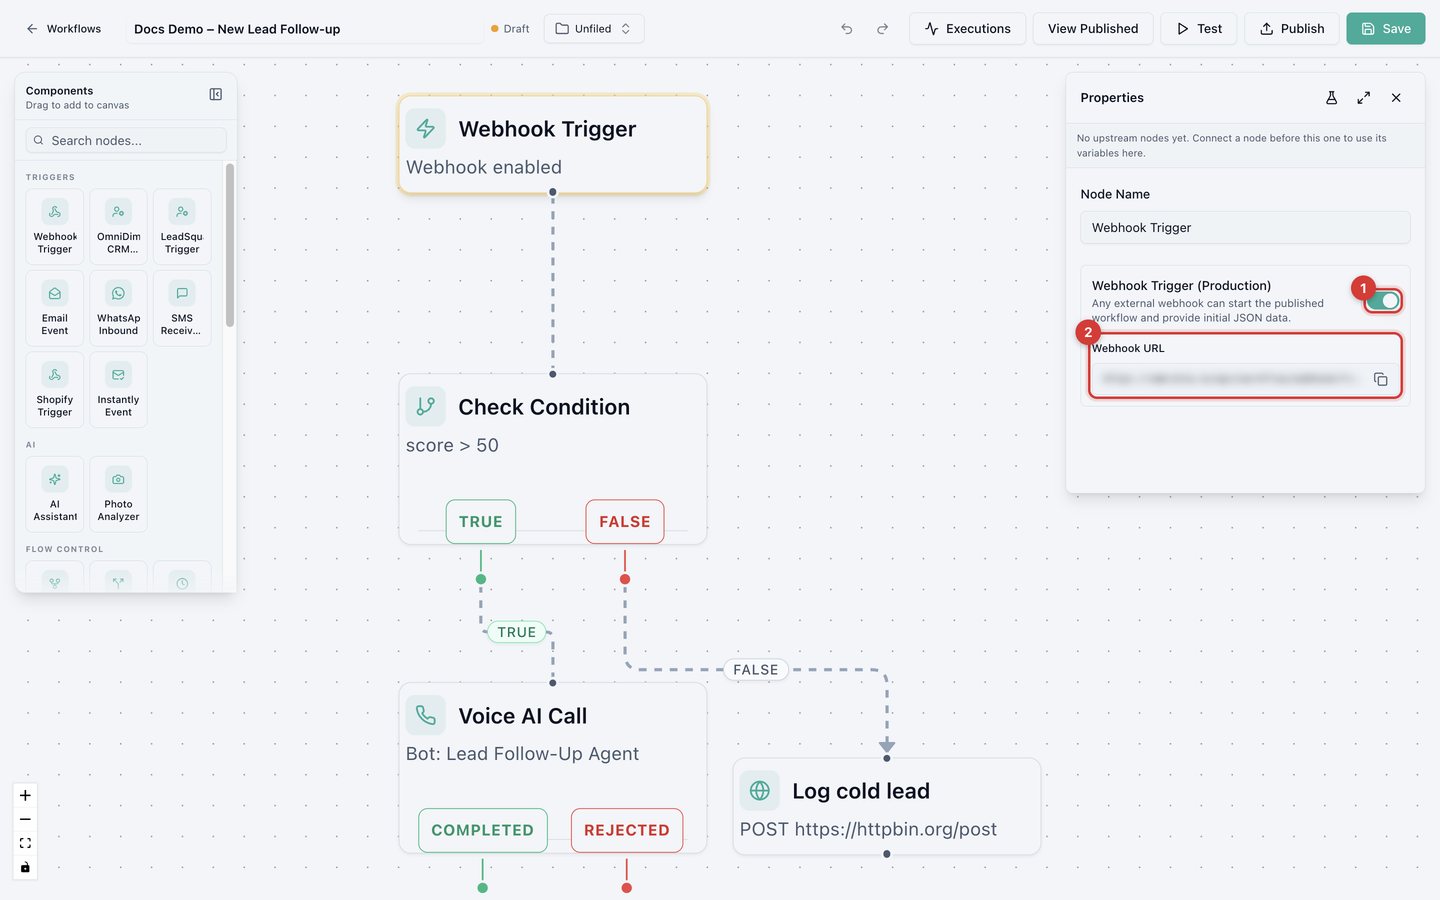
Connect your source
Paste the URL into your website form, CRM, or other tool so it sends new leads to the workflow.
Publish again after trigger changes
If you changed the trigger, click Save and Publish again so the live version includes the change.
Draft and published versions
Keep editing safely after publishing. Your edits stay in the draft until you publish again. Real events always run the published version.
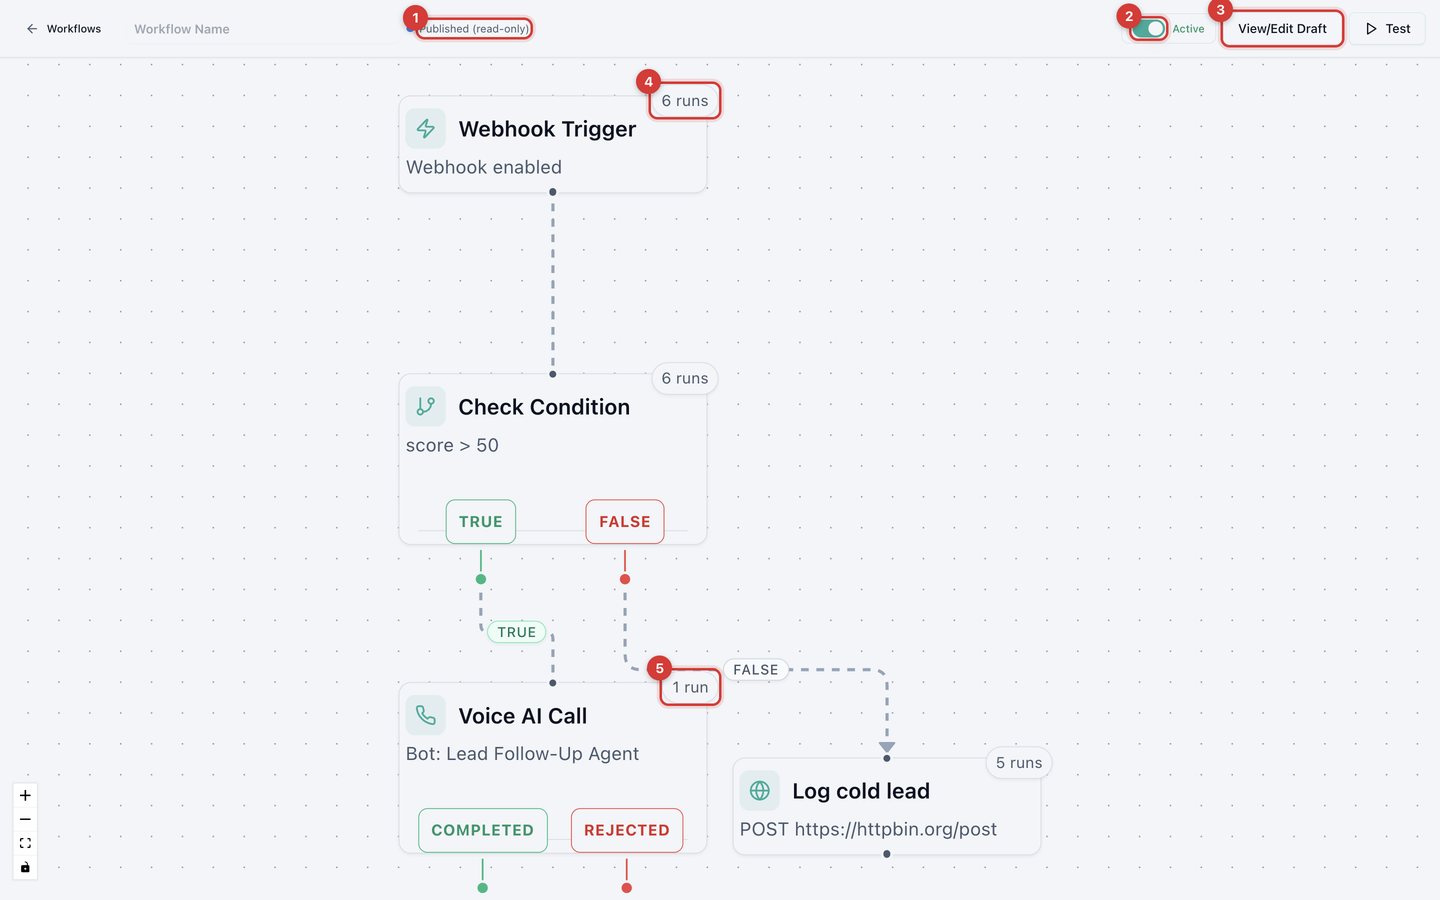
- The published version is read-only.
- Active pauses or resumes the live workflow without deleting anything.
- View/Edit Draft returns to editing.
- and 5. Run counts on each node show how many runs passed through it.